Friday, October 26, 2012

Monday Anamorphic experiments

Anamorphic experiments 

The aims here were to produce a successful method in making normal images into anamorphic designs.
The anamorphic pieces here when viewed from a certain angle look proportionate.
This blog post shall be updated with the angler photos.


So I drew this tester and put a grid on it.
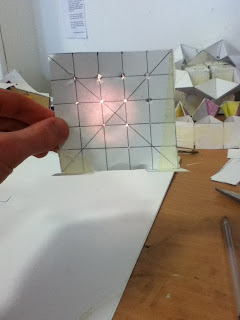
Then I remade a to scale grid and poked holes at the points of intersection.
Setting up the to scale grid I placed it at 90 degrees and shone a light at it.
The light shinning on the card is a representation of the human line of sight.


The shadow cast is an elongated distortion of the square grid.
The points of intersection are illuminated.
I marked down the points of intersection.
By making a new grid based off of these points of intersection making an elongated image becomes easy.
Elongated.
Slightly more elongated.
As the torches were not overly obviously distorted  I wanted to see what would happen to a more familiar  sight such as a face .


I bought L.E.Ds as they produced a brighter light. Making the shadow easier to outline.


I felt the need to distort the image further. I made an exactly half size scale grid of the image. The method of puncturing holes in the card i felt was lacking in accuracy so I cut squares out of the intersecting points. Then I  proceeded the process.  
 

This being the result. Although quite stretched I am interested in seeing how far the image can be stretched before it loses its form completely that is losing its form completely when viewed from the right angle to make the image appear proportionate. 

No comments:

Post a Comment